
Create a DHTML Tab Strip
Tab strips are commonplace throughout the web, and they’re utilized in a wide variety of ways, such as in site navigation or form wizards. Organizing links in a tabbed format can add quite a bit of style and functionality to your site, as many visitors are already familiar and comfortable with using tabs on other websites and even on other platforms such as their operating system. This tutorial shows you how to create a simple DHTML tab strip using HTML, CSS, and a small bit of JavaScript.
When I use the term “DHTML,” I am referring to “Dynamic HTML.” This is an endearing term that many web designers use to describe the fusion of HTML with other web technologies, such as JavaScript and CSS. By using various technologies in tandem, we can create dynamic controls that allow website visitors to interact with content directly on the page without the need to refresh the site with every subsequent click.
The HTML
As you will soon see, the tab strip is a prime example of a DHTML control. Before we delve into every aspect of the tab strip, let’s first start with the HTML:
<div class="tabStrip">
  <ul>
    <li><a href="javascript:openTab(1);" class="tabLinkActive" id="tabLink1">TabOne</a></li>
    <li><a href="javascript:openTab(2);" class="tabLink" id="tabLink2">TabTwo</a></li>
    <li><a href="javascript:openTab(3);" class="tabLink" id="tabLink3">TabThree</a></li>
  </ul>
</div>
<div class="tabContentActive" id="tabContent1">
  This is sample tab content (1).
</div>
<div class="tabContent" id="tabContent2">
  This is sample tab content (2).
</div>
<div class="tabContent" id="tabContent3">
  This is sample tab content (3).
</div>
The HTML is relatively simple. We are using an unordered list (<ul/>) for our tabs, and we are using <div/> tags for our tab content. As you can see, I am giving a unique id attribute to each tab link and to each tab content <div/>. This is important, as we’ll need a unique id in order to access these elements with JavaScript.
The JavaScript
We are using only one small JavaScript function for the tab control. Here is the code:
var activeTab = 1;

function openTab(tabId) {
  // reset old tab and content
  document.getElementById("tabLink" + activeTab).className = "tabLink";
  document.getElementById("tabContent" + activeTab).className = "tabContent";

  // set new tab and content
  document.getElementById("tabLink" + tabId).className = "tabLinkActive";
  document.getElementById("tabContent" + tabId).className = "tabContentActive";

  activeTab = tabId;
}
The CSS:
This CSS is a very basic example of what you can do to style your tabs. You can add colors, gradients, and background images to give the control even more design flare.
.tabStrip ul {
  margin: 0;
  padding: 0;
  list-style-type: none;
}

.tabStrip li {
  margin: 0 2px 0 0;
  list-style-type: none;
  float: left;
}

.tabLink {
  display: block;
  text-decoration: none;
  padding: 5px;
  background: #e8e8e8;
  border: #dadada solid;
  border-width: 1px 1px 0 1px;
  color: #8a8a8a;
}

.tabLinkActive {
  display: block;
  text-decoration: none;
  padding: 5px;
  background: #e0e0e0;
  border: #c0c0c0 solid;
  border-width: 1px 1px 0 1px;
  color: #0066ff;
}

.tabContent {
  display: none;
}

.tabContentActive {
  display: block;
  clear: both;
  background: #f0f0f0;
  border: 1px #dedede solid;
  padding: 10px;
}
The Result:
In true DHTML fashion, we have combined HTML, JavaScript, and CSS to create a fully dynamic user control that can appear anywhere on the web. I have taken the fundamentals learned in this tutorial and have created a more visually appealing example of this code. Click on the image below to see the demo.
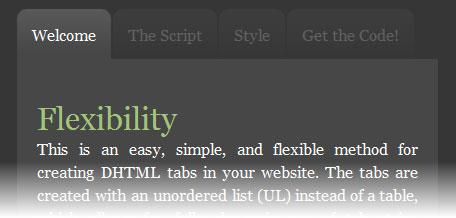
Note that the demo also utilizes Karate Corners to create rounded edges on the tabs. Learn more about Karate corners here.